
The Papermaker's Wet Floor
I guess I’ve been spoiled when it comes to worrying about water when making paper. Until my current studio that is. My last two studios were in garages with concrete floors that were graded, so the water conveniently flowed outside into nearby drains. When I moved into my current studio in November (located in Red Cliff, CO), it was carpeted. I removed the carpet, hoping there was concrete underneath, but alas, it is some sort of particle board.
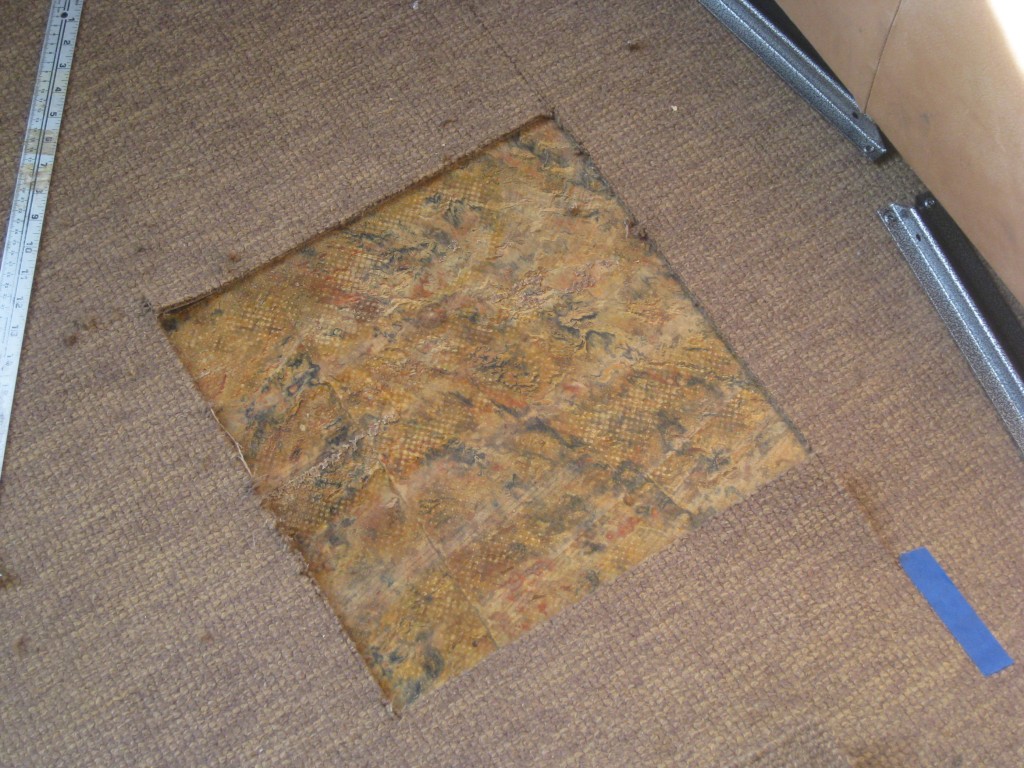
Removing the carpet.
After talking with several people about various options for impermeable flooring, I decided to paint over the wood, since this isn’t my permanent space. I put down three coats of porch paint.
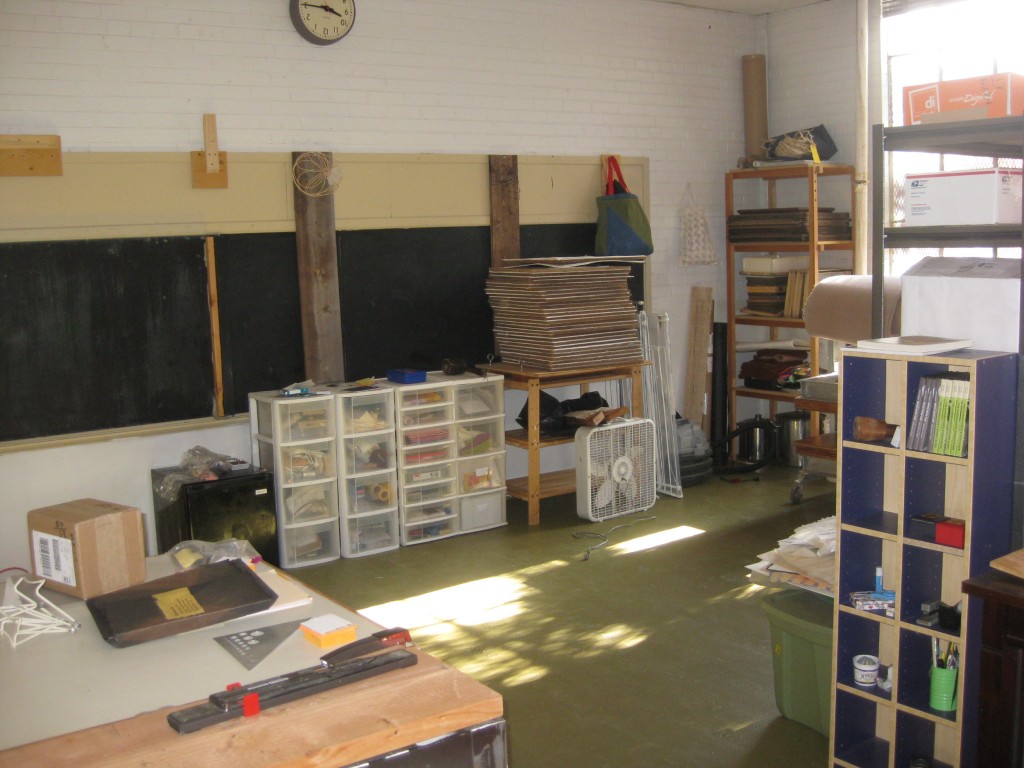
The painted floor.
It is holding up fairly well, but there is another issue: keeping as much water as possible from hitting the floor because cleaning it up is a pain!
My first task was to figure out how to get a hose onto the little sink (the studio is an old school room in a school house, so the sink is kid-size). After one long trip to Home Depot and two trips to Ace Hardware, I found what I needed – a series of adapters. I sealed the connection with some plumbers tape and was good to go.
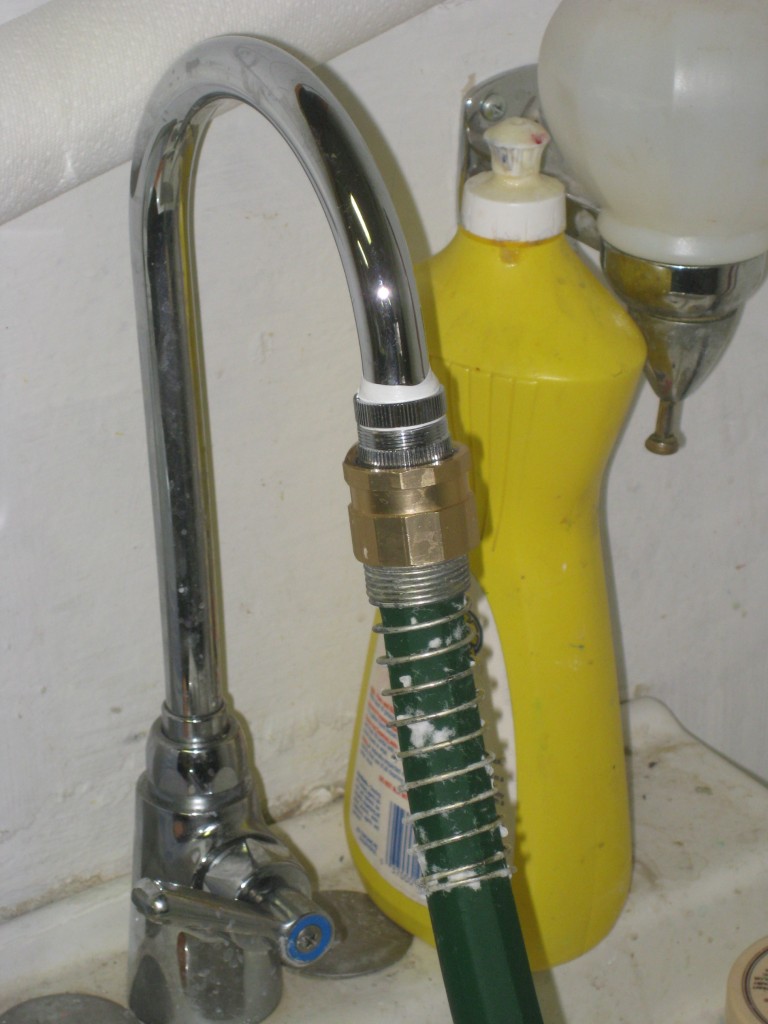
The studio sink.
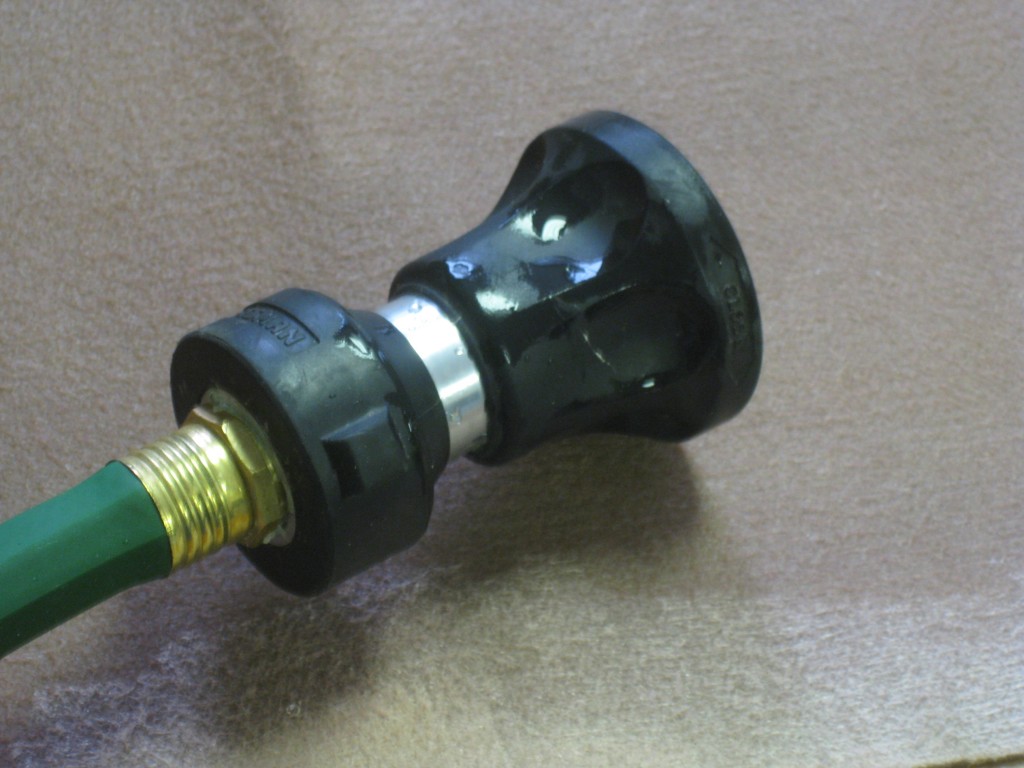
I have a nozzle on the other end, so I can take the water where I need it: to wet felts, clean buckets or fill vats with water. I’d like to put a splitter on the faucet so that I could have the hose and the sink, but the sink isn’t big enough to catch the water from the splitter (luckily, there is a utility sink in a nearby hallway).
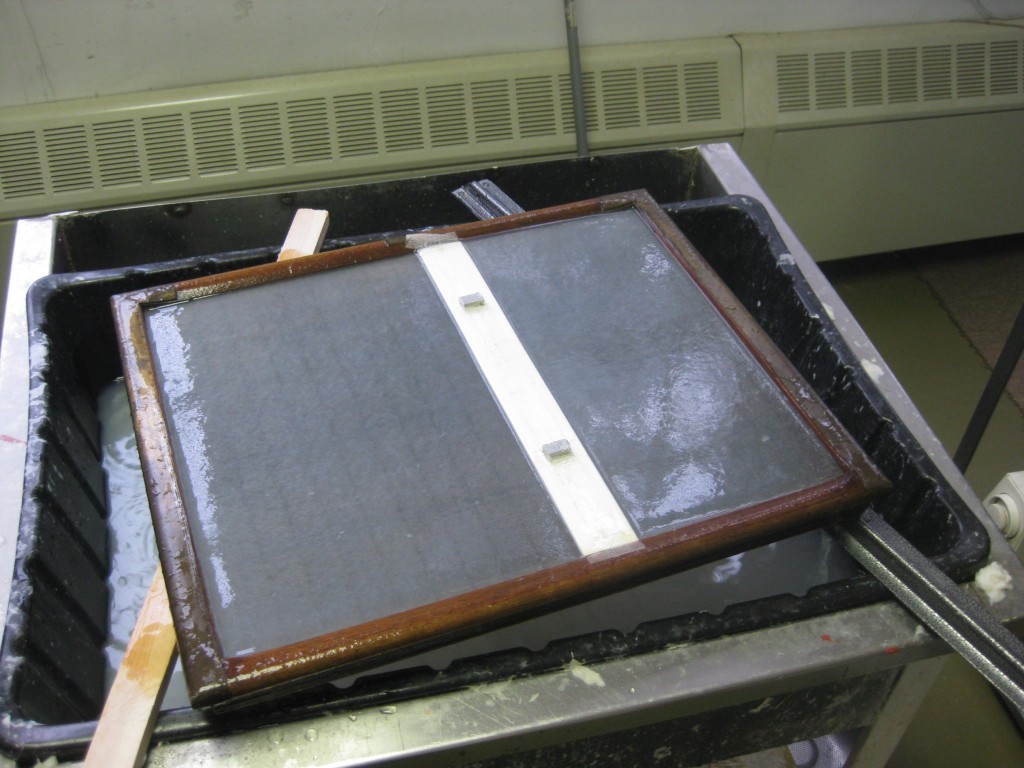
I’ve had to adapt my vats slightly to prevent water from spilling onto the floor when I’m pulling sheets. I nest a smaller vat inside of a larger one and lay these “sticks” across the vat to hold the mould as each sheet of paper drains (don’t ask me why, but I haven’t managed to remember to get two matching pieces of wood when at the hardware store).
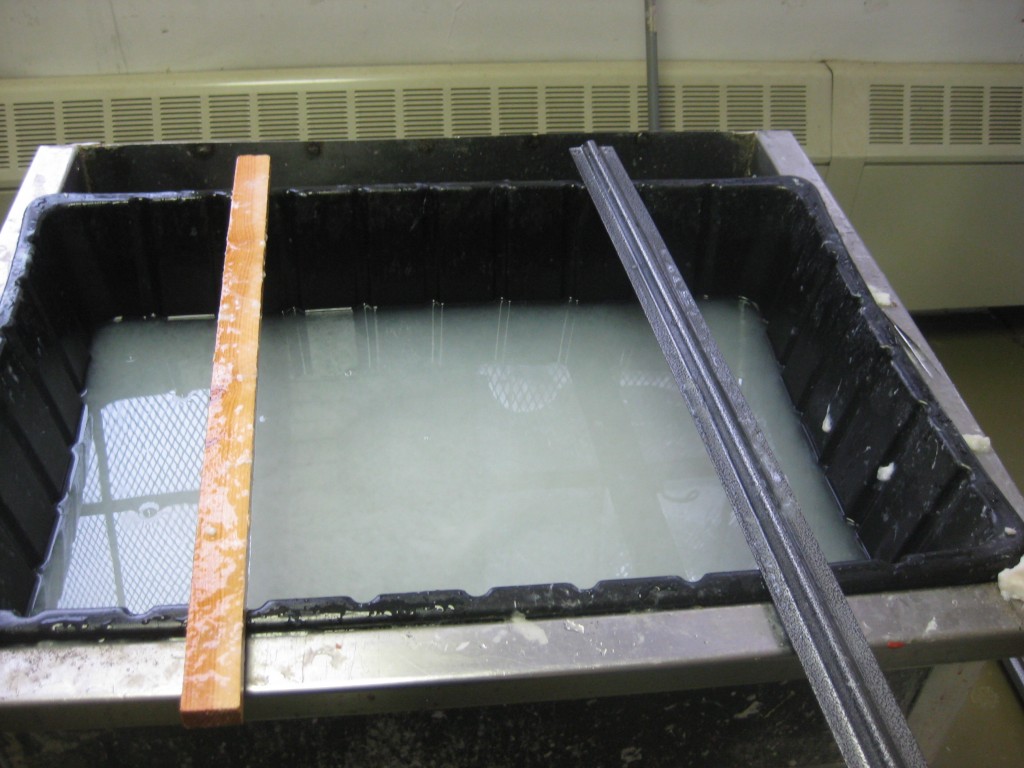
This sheet drainage method also means that the excess water drains back into the vat, which saves a bit of water.
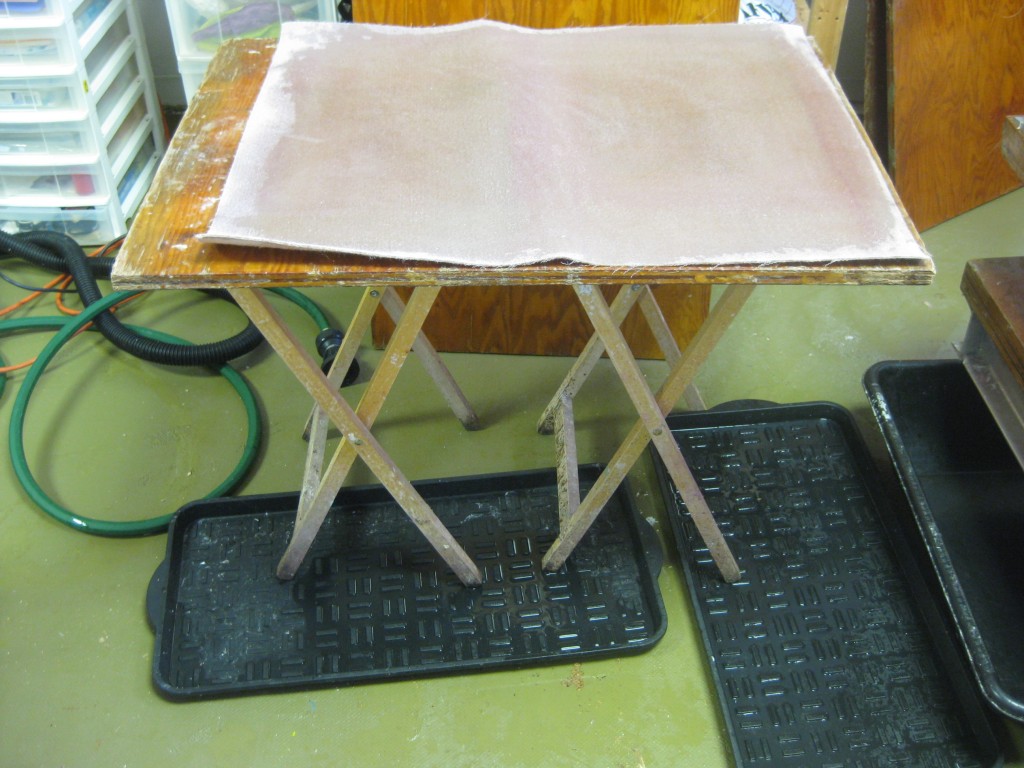
I found these boot trays, which collect water that drips from my couching stand.
And I move one of them underneath my press accompanied by two cement mixing tubs in the front and back which collect most of the press water.
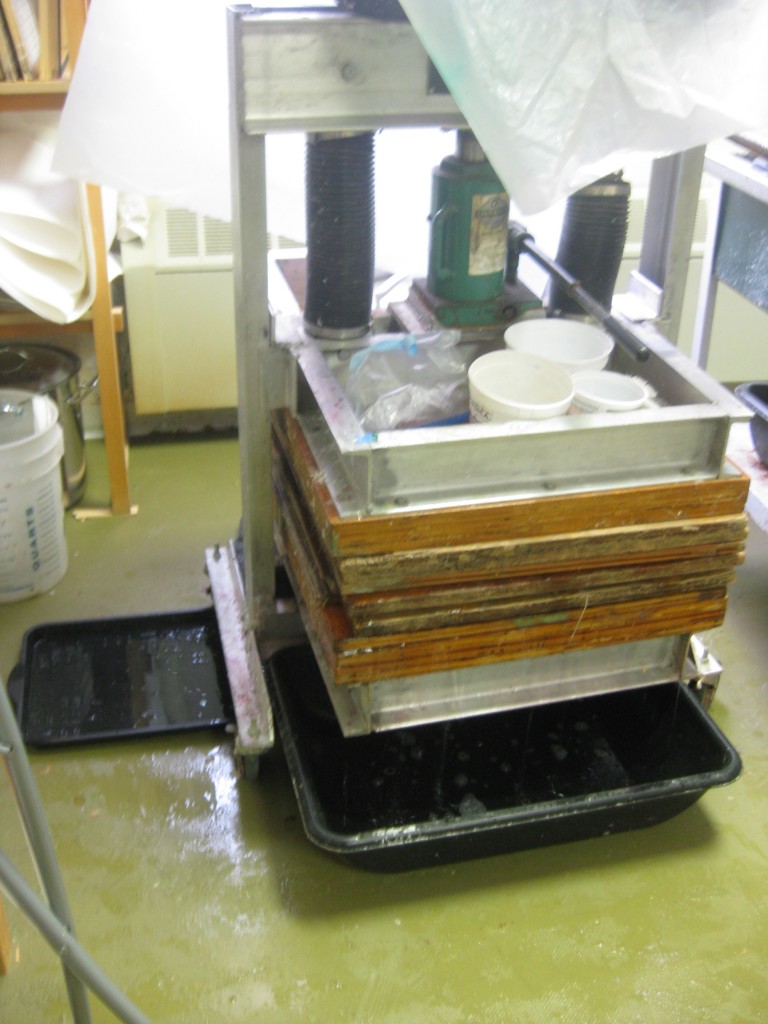
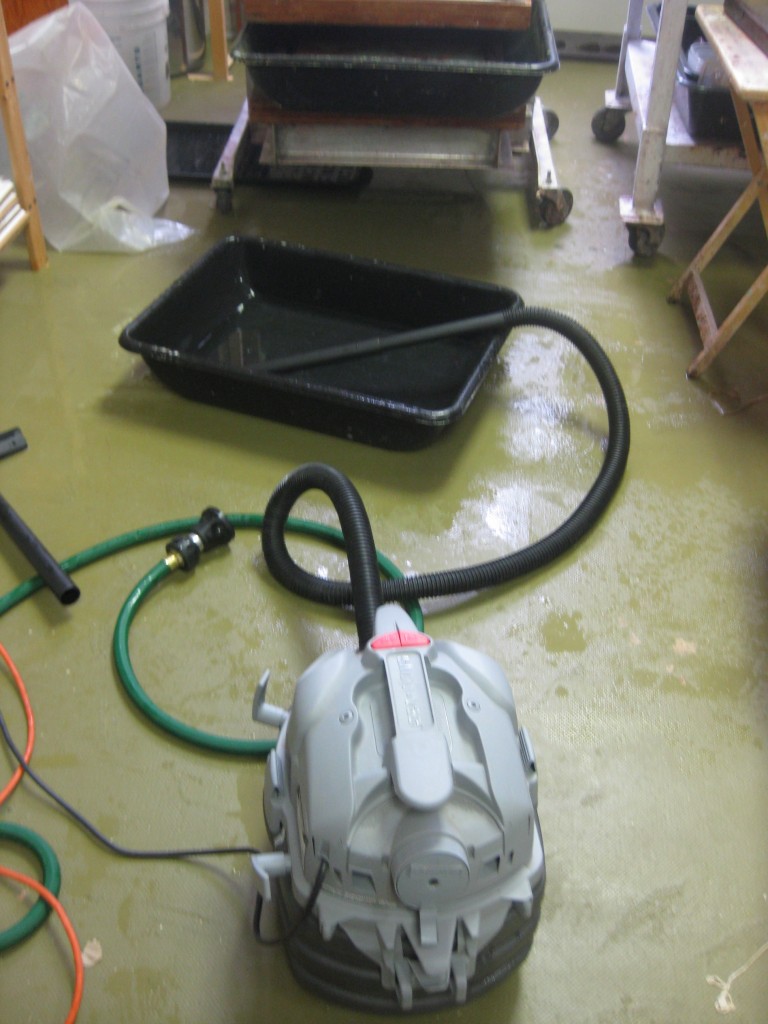
Any excess water and inevitable spills get cleaned up with the wet vac.
I know there are a multitude of methods for keeping water in its place and for saving water. What are you techniques? Please share them as a comment below.
My DVD, The Papermaker’s Studio Guide, is a new resource featuring: how-to tips on setting up a professional papermaking studio; multiple ways to process pulp, form sheets, and utilize diverse pressing and drying techniques; and a range of unique papermaking techniques such as pulp painting, watermarking and working sculpturally with paper pulp.
Watch the trailer and order your copy today!
15 Comments
I love your “Rube Goldberg” approach to making art. You can google Rube Goldberg if you are too young to remember his Sunday Funny Paper drawings.Keep up the good work. V
Before I had a studio space, I made paper in my living room on hardwood floors. I covered my work surface (card table) with bath towels. At the corners, towels extended off the table into 5 gallon buckets. It worked. This was when I was hand pressing and drying on the picture window.
I love your problem solving. Creative thinking happens at every step of the way!
Thanks for the comment, Leandra! Your note about towels reminds me of the Shamwow someone gave me a few years ago. They absorb a lot of water! And the idea of channeling water into a bucket is a great one. My old paper press had a tray on the bottom that channeled the water to one corner. A bucket placed underneath caught the water.
My basement studio floor is concrete, but is old and pitted and cracked, so I covered it in a seamless piece of vinyl flooring (a remnant). There are no floor drains in my studio, so I work pretty much the same way. I use those ‘sticks’ (mine don’t always match either) over a separate draining vat (and add the water back into the vat periodically), my couching stand sits inside big concrete-mixing vats; ditto for pressing.
The Studio Guide is excellent! I highly recommend it.
Melissa,
I considered a vinyl remnant! I like the suggestion of putting the couching stand and press in concrete mixing tubs. My next challenge: figuring out a good system for transporting water to the utility sink. I suck the water from the vats and trays into the wet vac, but it isn’t on wheels. I’m guessing there must be one out there…
When I taught Portable Papermaking at the Center for Book Arts (NY), we needed to haul all the water to the bindery and then back to the sinks; we used two big plastic bins on furniture movers, one for clean water and one for cleanup. We also lined the wood bindery floor with plastic (it’s on the fifth floor, and there were businesses below!) and then we put flattened cardboard boxes down over it, which made less slippery footing and also absorbed some of the spilled water.
BUt what did you do when you got to the sink? Lift the bins? I guess that works okay with two people, but I’m thinking of some sort of syphon system…
Oh no, we used pitchers to bail it into two colanders lined with paint strainers to keep the pulp out of the drain. I have something similar I use when I travel to residencies, too difficult to describe here. I’ll send you a photo.
(I was supposed to put that ‘system’ into the next HP issue, and just nowrealized I missed the deadline!!!)
My “new” 4yr old studio does not have drains in the floor so I use a tremendous amount of newspaper…just pile them around where despite valiant efforts to keep the floor dry..drips happen. If hot and sunny (South Carolina) I dry the newspapers and reuse. But my best invention was to use a 1/4″x3 1/2″ piece of wood accross the vat to hold the draining mold and deckle in the center of the vat rather then a stick with the mold hanging over the edge of vat dripping onto newspaper.. I drilled large holes in the wood panel so it drips right back into the vat. I keep a barometor on the wall and a dehumidifier at the ready. I have a small studio with a bookbinding section…. water removal always a challenge.
Thanks for sharing, Mary! This is an excellent solution for a small space. I wish I knew how to attach your image here…
I think you need to invent a watersucking “room-bot” to chase after all the drips that inevitably get on the floor. Your solutions are great, by the way,, simple and effective. In the Tim Barrett Japanese papermaking book there is a diagram for a worktable with about a 1” lip at the edge all the way around the table, and a drain hole at one end of the table, with a bucket under the hole. Similar to what you’ve already got, but maybe worth a look.
when i built my press i had a drain tray built around the bottom plate with a hose to direct the water into a bucket or into the garden. this helps.
Also, a wet dry vacuum is invaluable
Thanks, Esther. My first press had a tray, too. I got it from a woman who made paper in her 5th floor NYC apartment!
Hi Helen,
Another solution for the floor paint is “pool paint” I have used it to make 3 x 4 foot paper dyeing trays. This keeps the water in a wooden vat especially well.
Thanks for all of the beautiful images and ideas!
Susan Kristoferson
Susan, I’m going to try pool paint when I need to repaint my floor! There are already a few places where the paint has peeled up, due to rolling or dragging…