
Today begins another 25 Days of Paper to celebrate the season by sharing the wonders of paper.
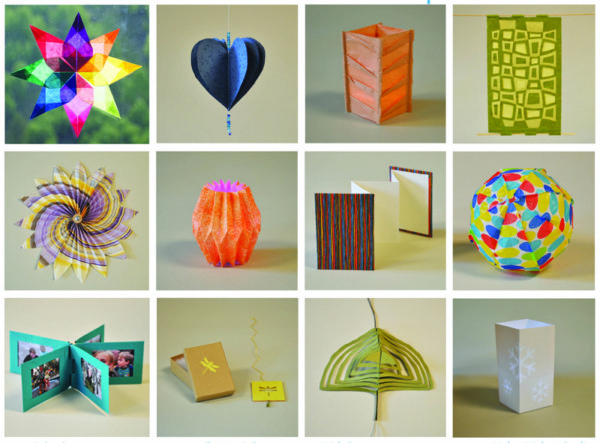
This year, I’ll be highlighting the projects from the Twelve Months of Paper Calendar on odd days and various paper companies, artisans and products on even days. Special thanks to all of you who purchased a calendar. The custom paper pack has been a big hit, and of course you are welcome to make the projects using your own papers too. I’d also like to give a big shout out to the calendar sponsors: Arnold Grummers, Oblation Papers & Press, Paper Connection International and Washi Arts. You’ll be hearing more about these paper companies over the next 25 days.
Please note: if you are giving the calendar as a gift, or prefer to focus on the projects throughout the year, I will be repeating these odd-day blog posts at the first of each month in 2017.
I’ve started a FB group where we can share our creations, leave tips and comments and ask questions (only really important ones please). Join us! Tell your paper loving friends, too! The response so far has been great, and I plan to make the calendar an annual tradition.
Feel free to share this post with your paper-loving friends.
Now the fun begins!
——————————————————————————————————————–
I thought I’d kick the 25 Days of Paper off with the first tutorial in the calendar. It’s a bonus project – for December 2016. Have you hung your calendar? I’d love to see a picture (please post it in the FB group). Here’s a picture of mine.

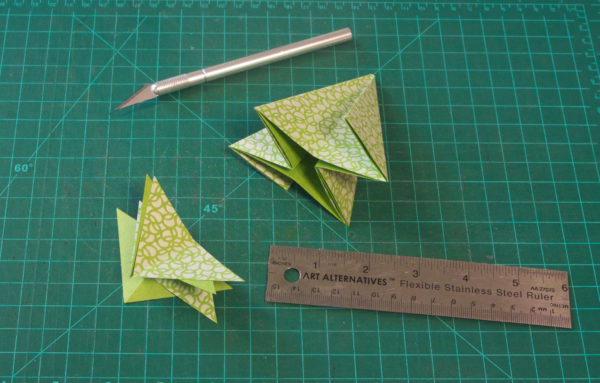
And now, without further adieu, the Pop-Up Tree:
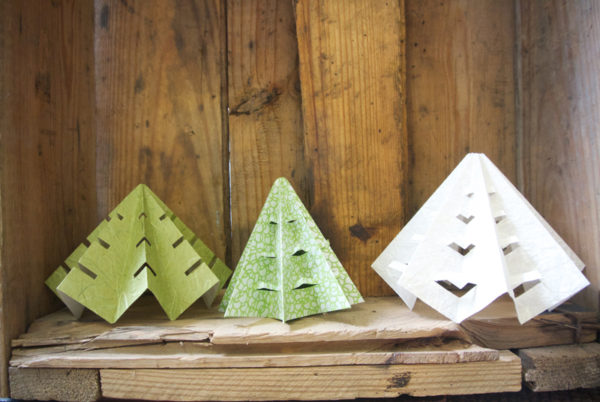
About the paper: The Pop-Up Tree in the center is made from a Japanese printed paper called Pearlized Peas from Washi Arts. It is a light card weight, which makes it perfect for folding and holding its shape. If you don’t have the custom paper pack, cut a square of paper to 7-1/2″ x 7-1/2″.
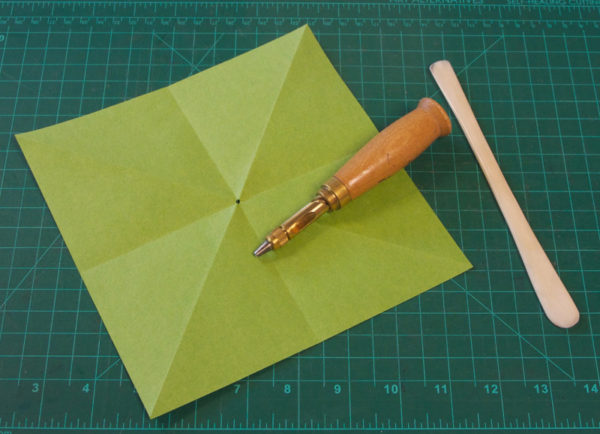
Step 1: Mountain fold the square of paper in half in both directions (pattern side face up) to create four square quarters. Unfold paper then valley fold diagonally in both directions. If you have a Japanese hole punch, punch a small eighth-inch hole in the very center (if not, you’ll make a small cut in step 3).
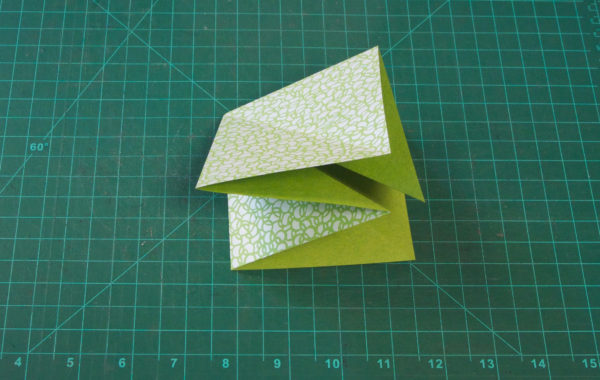
Step 2: Orient the paper so that the solid green side is face up (as pictured in step 1). Push down in the center with your fingertip. The paper will pop and you will be able to follow the natural direction of the folds, guiding them to create this origami base fold.
Step 3: Fold each of the four folded edges in to meet the center fold, creating a tree shape. Using a ruler, cut off the bottom triangles beneath the folds you just created. If you didn’t punch a hole in Step 1, cut a tiny slit across the tip of the tree, cutting through all of the layers.
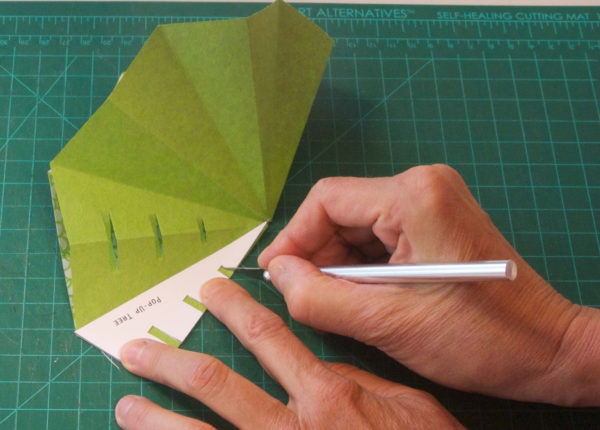
Step 4: Turn the tree inside out and reverse folds as needed to create an accordion pattern all the way around the tree. Use the template found in the center of the calendar as a guide to cut slits into the eight mountain folds, working your way around the tree. Carefully pop the folds in and crease them one at a time.
Here’s a video of how to make this project.
And here’s a lovely blog post about the Pop-Up Tree project on the My Paper Arts Blog!
——————————————————————————————————————–
2 Comments
[…] I think it’s extra fun if you make it with a double-sided paper, because it is reversible! Click through to get the instructions and watch a video tutorial on how to make yourself a tree (or a […]
[…] blog y compartió un proyecto introductorio de su Calendario de Doce Meses de Papel – es un árbol de papel para hacer pop-ups . Tal vez hacer unos cuantos para que vayan con sus pequeñas […]