
Drying Techniques
For some reason, i’ve been getting a lot of queries about drying paper recently. The following text is excerpted from my book The Papermaker’s Companion, with a few additions.
There are a few things to consider when choosing a drying system: climate, space, and the look of your finished sheets. I recommend starting simply. There is no need to invest in an elaborate system; I have seen beautiful, high quality papers that were made using basic equipment. The more humid the climate is, the longer it will take to dry papers.
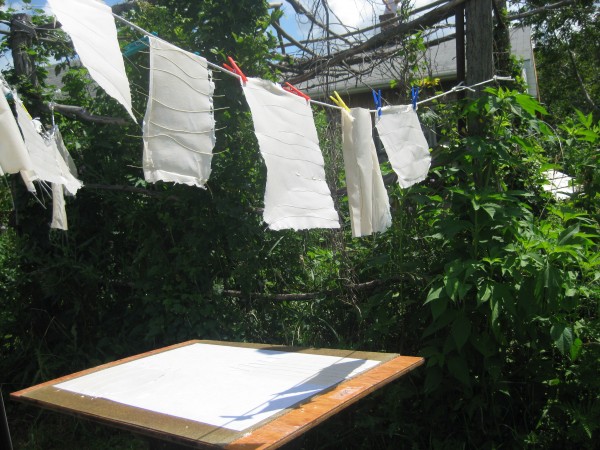
Experimental abaca papers drying on a line (not intended to dry flat)
Where you will dry your papers is another consideration. You can hang them on a clothesline, dry them in spurs (this is the traditional English method of four to five sheets stacked together), lay them out to dry on a table or a rack, brush them onto boards or walls, or set up a drying system (coming next week).
The method of drying you choose will affect the texture of your papers as well. Experiment with different techniques to see which you like. Try drying one type of paper in different ways, and compare your results.
Mould and Air Drying
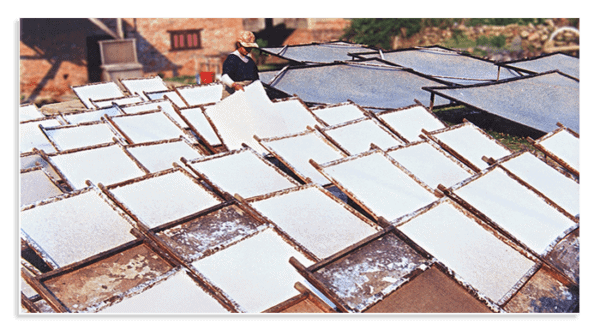
Lokta paper drying on moulds in Nepal
In some countries, papers are not pressed at all – they’re dried directly on the moulds on which they were formed. The sheets stick to the screen surface and are held taut as they dry. When dry, the sheets can be peeled off. This system is typically used in dry climates; sun dries the sheets rapidly, and the moulds can be reused. Although the system requires the use of many moulds, it does eliminate your need for a press and a drying setup.
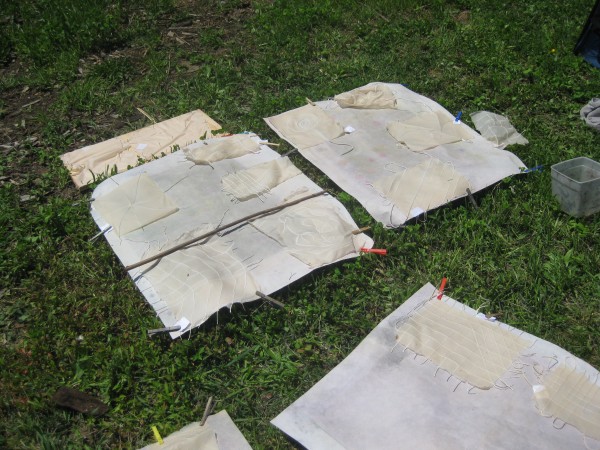
These sheets have been removed from the pellon they were couched on and placed on dry pellons.
Another simple method is air drying — just let your sheets of paper dry on the surface upon which you couched them. I recommend couching onto pellon if you are going to air dry, because it dries quickly. Spread the pellons out on screens or on a rack so that air circulates around them, or hang them on a clothesline to dry. You can also pin pellon to a wall or board to hold it taut as it dries. When the sheets are dry, just peel them off it. The sheets might cockle (curl) slightly — you can put them under clean, heavy books or boards to flatten. If they are still cockled, gently mist them with water to help them relax, and put them under weight between blotters or newsprint.
Air Drying on Silkscreen

See the giant silkscreen on the left behind the papermaker? It doesn’t have any paper on it in this shot.
Another process I’ve seen that does not require a press or a drying setup was developed by Nance O’Banion. She was doing a lot of silkscreen printing and wanted to figure out a way to adapt her equipment for papermaking, as well as make good paper with less equipment (which she calls “schmo-tech”). She had a series of 4-by-8-foot (1.2 x 2.4 m) wooden frames with silkscreen stretched across them. She couched freshly formed sheets of paper directly onto a screen that could be propped against a wall. Many sheets could be couched onto one of these screens, and they were either left in the sun to dry, or the water was sucked out of them from the back by running a wet vac over the screen.
Loft Drying

Stacks of spurs, illustration by Alison Kolesar from The Papermaker’s Companion
Loft drying was the way papers were dried in Europe in the old days. To loft dry your sheets, you must first press them. After pressing, separate them from their felts and pile them in stacks (or spurs) of four to six sheets each (depending on their thickness), to prevent them from cockling very much as they dry. Pile the sheets one on top of the other, lining them up precisely. Rotate some sheets so that the stack isn’t piled exactly as it was for the first pressing. This will help even out any inequalities in the sheets. Put a felt between each spur and form a post of spurs. Put this post in the press again and press a second time, this time just until you see drops of water forming at the edges of the felts. More pressure could inhibit separating the sheets in the spurs when they are dry.
After pressing, the sheets in each spur should be securely stuck together. You can hang the spurs on a clothesline with clothespins, or you can lay them flat on a rack or screens. (Make sure they get air from all sides so they dry evenly.) Alternately, you can drape the spurs over plastic tubing or thick ropes. Pretest the material you use to make sure it won’t stain your paper. If you can control the air circulation, try to direct it to come into contact with the breadth of the sheets, not the edges, for the least amount of cockling.

Separating the spurs, illustration by Alison Kolesar from The Papermaker’s Companion
When they’re dry, separate each spur by starting at one corner and peeling the sheets apart in one fluid motion. Separate the spurs in halves: If you have a spur of four, for instance, first divide it into pairs, then separate the pairs into single sheets. Your sheets will probably cockle to some degree, but they can be flattened with another pressing. Make a stack of individual sheets, rotating them again, and press them again to flatten. If the sheets cockle a lot, you may need to gently moisten them with a spray mister to relax them before you press.
Board or Wall Drying

Brushing a sheet onto a board, illustration by Alison Kolesar from The Papermaker’s Companion
In China, Japan, and other Eastern countries, sheets of paper are often brushed onto boards or walls for drying. The sheets stick to the boards and are peeled off when dry. The paper ta
kes on the finish of the board or wall, showing the grain or texture on the side of the sheet that was stuck to the surface. You can use almost any smooth surface for drying papers, such as wood, metal, glass, plexiglass, or formica. You can even brush your sheets onto plaster walls, as is common in India, where the walls are heated by the sun and the sheets dry quickly.
To board or wall dry, first gently press your sheets — they should not be quite fully pressed (i.e., they should retain some moisture) or they won’t stick to the boards. Lift one sheet from its felt and lay it on the drying surface. Use a rubber brayer or wide paintbrush to affix the sheet to the surface. If you’re brushing onto a vertical surface, there is a technique you can use to adhere it while keeping it from falling to the ground. Start by brushing diagonally from the center toward the upper right corner of the sheet. While holding the upper left corner with your fingers, brush from the upper right corner to the bottom left corner. Next, brush from the center to the upper left corner; then continue brushing from the center out, to adhere the rest of the sheet. Make sure that you cover the entire surface of the sheet, brushing with firm, even strokes. If the sheets were pressed correctly, you should be able to brush firmly without damaging their surface. The edges must be well adhered, because they will dry the fastest and could pop off the drying surface. If the edges curl before the sheets are dry, they will shrink more than the rest of the sheet and be difficult to flatten.
Some fibers shrink a lot when drying, and will pop off boards before they are dry. You can try applying methyl cellulose to the edges of the sheets as you apply them to the boards to help them stay adhered until dry. If you are drying your sheets outside, you might try starting them in the shade and then moving them into the sun after they are somewhat dry. This allows them to dry slowly and might prevent them from popping off. When they’re dry, peel the sheets of paper off the boards. Start at one corner and peel in one fluid motion. If you have a problem releasing the corner, try using a razor blade to lift it, but be careful not to damage the drying
Next week. I’ll post instructions for building your own drying box.
I’d love to hear about other methods you use for drying your papers. Feel free to leave a comment below.
7 Comments
If you are drying paper on an object:
Cantilever 2 pieces of wood, plex, etc. over the object, forming a ‘tent’. Place a fan for exhaust at one end, and a heater (blowing in) set at low, at the other. No need for a heater on a warm, dry day, but another fan is helpful.
Thanks for the tip, Fritzi! Is the tent so that the air is directed on the object?
Great post! Thanks for sharing this information so generously. ; ]
Thanks Helen
Very comprehensive, I wasn’t familiar with the loft drying technique at all!
Really looking forward to reading @ your drying box next week.
I’m embarking on building a large one…but I’m a little confused re the fan …some recommend reversing the fan so that damp air is sucked out…and others recommend conventional placement so the fan blows into the post.
Any comments on this would be appreciated.
All the best and thanks again
Joanna
Joanna, I use a fan that blows air through my drying system, but I know people who use one in reverse that sucks. I think it does the same thing – it pulls the air into the room either way. I’d be curious to know (also) what the difference might be. You may need a dehumidifier if it is humid or cold when you’re drying.
thx is cool jut put it outside.
Any suggestions for keeping abaca from yellowing during the drying process?